We planted a new tree and wanted to stabilize it with three posts, so it won't blow over in a storm, while it is still young. It turned out that planting the tree was the easy part. Hammering the 2.5 meter support posts into the ground, was a whole 'nuther problem.

One cannot use a sledge hammer on a tall post, since climbing onto a ladder and swinging a heavy weight around, two meters above ground, is sure to cause a rapid, unplanned descent from the ladder.
The safe solution is a pile driver - a heavy pipe that is closed at one end.
I could not find a pile driver at the local hardware store and in any case it would cost around 65 Euro, so I took some scrap wood and a two hundred year old sledge hammer and there we go. The only expense was a handful of screws.
The thumper works remarkably well. It took longer to make the thumper than to set the three posts, but now I can also use it to drive in a sand point shallow well for the garden.

Start with a 15 cm piece of a square fence post - larger than the diameter of the stake that you want to drive in. Build a box around it such that you have a channel of at least 50 cm below the block. Strap a heavy weight above the block and there you are. It doesn't have to be ridiculously heavy.
Obviously a steel thumper will last forever, while a wooden one will eventually wear out/split, but a wooden one like this, will last long enough for use by ordinary mortals.
Do sand the wood down to avoid getting splinters in your hands while using it.

Make a mark 50 to 75 cm from the tip of the post so you can see when to stop!
Put the top of the post into the thumper, then stick the point into the ground and raise it up. Bonk the post in by raising and dropping the thumper 30 cm or so. Wedge the post with your foot to help it go vertical.
Removing the thumper from the post can be tricky, since it is unbalanced with the big weight at the top, so it will likely drop onto the ground as soon as you clear the top of the post - try not to drop it on someone's foot!
For driving a Sand Point Well Pipe into the ground, I built a tripod gantry with two pulleys, to make it easier to lift the thumper.
Here is a picture of the pipes about 2 meters into the ground:

Only 5 meters more to go...
I'm sure the neighbours will be happy when I reach the end of my pipe.
Wheelies
Speaking of heavy stuff. I built some heavy garden gates and needed to drag them about 20 meters from the garage to the corner of the yard and my back was getting sore.
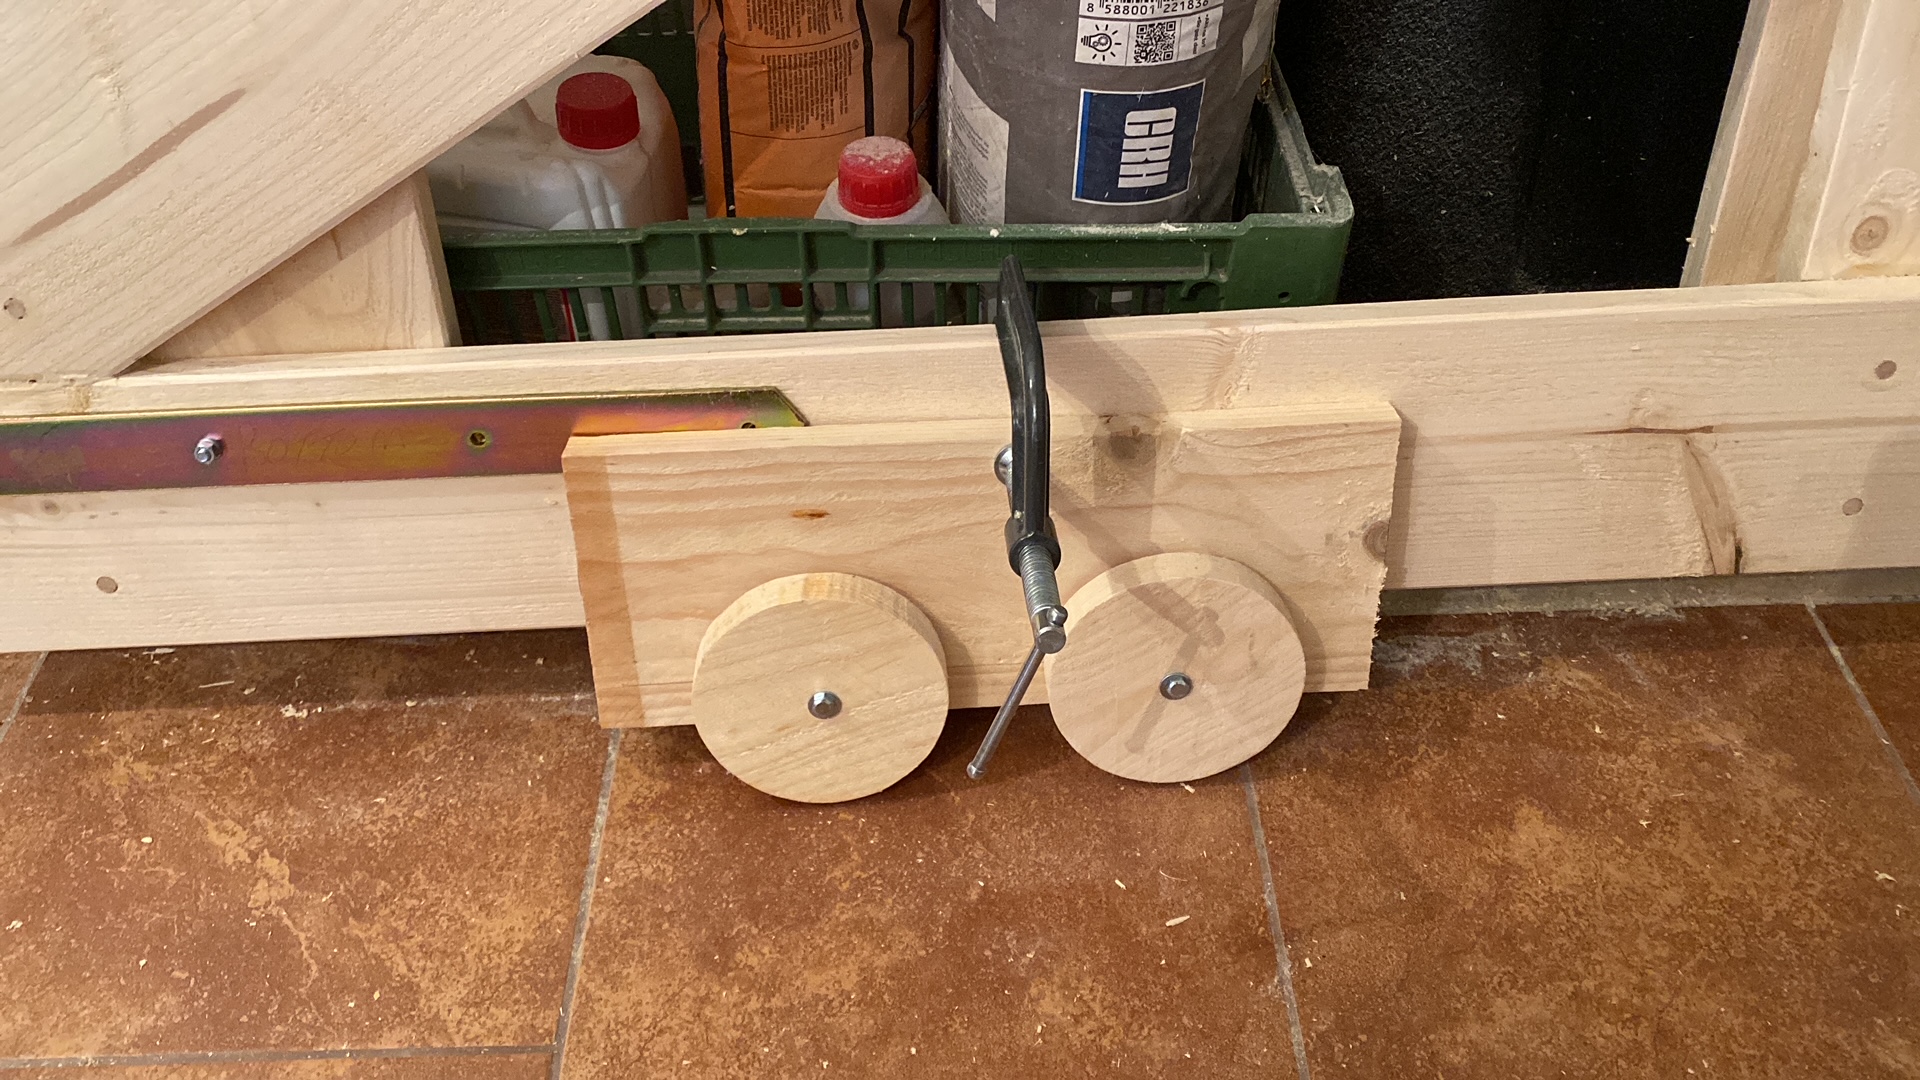
So, I re-invented The Wheel!
Two wheels close together, roll better over bumpy paving stones, than a single wheel.
It only has to work twice.

The above wooden wheels turned out real good, so I made a couple more, to clamp on and drag random heavy things around, such as my work table - which is an old recycled kitchen table with strengthening around the legs.
Now I can tip it over and then just need to balance it a bit, when I drag it off to the storage area. I may cut another pair of wheels and screw them to the table permanently.
For something that won't get hundreds of miles of use, scrap wood wheels are great and cost nothing - OK, you need a screw and two washers also, but that won't break the piggy bank.
A little wooden wheel, cut with a 50 mm hole saw, can make a nice low friction Garden Gate Support:

The roller and block (with a rounded corner) lifts the door a few mm, so that the sliding bolt lines up perfectly, making the gate easy to open/close. Don't glue the block - use two screws instead. When the system needs adjustment, unscrew the block and reposition it.
In total, I built five wooden garden gates and used Soudal Urethane Exterior glue. The gate frames are made with lap joints and 10 mm dowels. The inside panels were simply glued in with lap joints and no dowels. After 2.5 years the panel planks started to pop out on the gate that is opened and closed the most - it gets the most flexing and slamming and the glue eventually failed. So then I had to drill a couple hundred 6 mm dowel holes from the insides of the gates, to leave the street sides unspoiled. After some sanding and painting no one will be the wiser.
With a task like this, applying glue to the dowels is a big chore, and getting glue on your fingers is best avoided - makes your skin awfully dirty looking. I screwed a plastic lid to a block of wood and put a piece of wire across it. Filled with a puddle of glue, I then used long nose pliers to dip/roll the dowels in the glue and scrape the excess glue off and then stick them in the holes, followed by a little hammer tap and Bob's yer Uncle. The trick is making the excess glue drip back, instead of dripping on the floor...
On the whole, my conclusion is that Soudal Exterior Urethane glue is pretty good, but all joints should have some cross connects such as dowels for further mechanical strength.
La voila!
Herman
Comments
Post a Comment
On topic comments are welcome. Junk will be deleted.