OpenEMS with Octave and SciLAB

I wanted to do some advanced RF antenna development work and needed an electromagnetic field solver that is a bit more up to date than NEC2.  Commercial solvers from Matlab, Ansys and others are hideously expensive (in the order of $20,000 to $50,000) and do not fit in the wallet of a hobbyist or a small consulting company.  Recently, openEMS became available and it fills the niche with a capable free tool. 

In general, openEMS is a solver - a Finite-Difference Time-Domain (FDTD) numerical engine.  You interact with it through Octave, which is almost identical to Matlab.  You can watch a good video by Thorsten Liebig here: https://www.youtube.com/watch?app=desktop&v=ThMLf0d5gaE
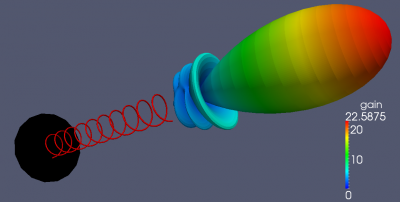
 

Getting it to work is a little painful, but it is free, so bear with it - then save a backup clone, or a zipped copy of the whole virtual machine directory and NEVER update it, to ensure that it keeps going and doesn't get broken by future updates, right when you are in the middle of something important and working against a deadline...

Virtualbox/VMWare with Devuan Linux

The easiest way to install openEMS (https://www.openems.de) with Octave and SciLAB on any computer system, even my 12 year old Macbook Pro, is to install VMWare (https://www.vmware.com/products/workstation-player.html), or Virtualbox (https://www.virtualbox.org/), then download and install Devuan Linux (https://www.devuan.org) and install OpenEMS, Octave (https://octave.org) and Scilab (https://www.scilab.org) from the repositories.

Devuan is the best UNIX version for scientific and engineering use by far!
(Sadly, Ubuntu, Fedora etc. have become middle aged, bloated and slow and do not work very well in a virtual machine anymore)

Download Devuan Chimaera Desktop Live AMD64 from here: https://www.devuan.org/get-devuan#https-mirrors

Installing Virtualbox and making a virtual machine is a pain in itself, but I am not going to go into that here.  Even though I have been using Virtualbox for decades and done this hundreds(?) of times, I still had to try three times to get Devuan installed and running, so it needs a nice cuppa and some patience, possibly mixed with a healthy side of googling (Put linux as the first word of any search to cut the cruft).

Once Devuan is up and running, upgrade Linux to the latest security version:
$ su -
password
# apt update
# apt dist-upgrade


BTW I prefer having a normal root user and sudo - it is one of the install options of Devuan - therefore the "su -" trick.  I just don't like typing sudo all the time.

If you cannot automatically get into the live Devuan system, log in with root and password toor.  The next time you restart it, it should log in automatically.  The default user is devuan with password devuan.

If you get repository security change trouble, you may need to do:
# apt --allow-release-info-change update

Virtualbox Guest Additions

Once you have a Devuan virtual machine installed up and running, install the Virtualbox Guest Additions:
Click Devices, Insert Guest Additions CD Image, then open a file browser and click on the Guest additions device at the bottom left Select Open a Terminal Here.
 
Run:
$ sudo ./VBoxLinux[Tab]...
 
Now exit and restart the Devuan virtual machine to activate a smooth running GUI with the use of a shared clipboard, to make it easy to copy things between the guest and host. 

Guest Power Management

Finally, run the Settings Power Manager utility and turn all power management and go to sleep features off on battery and plugged in: Slider Left = Never.  The host computer will manage the power, the guest will just mess things up, go to sleep and never wake up, requiring a guest power cycle - best avoided.

OpenEMS Status on Devuan Daedalus

The openEMS package was not built and installed right, so one has to rebuild it from source, which is described here: https://wiki.openems.de/index.php/Compile_from_Source.html, but which first need the C compiler and development tools installed.  (It always amazes me when people develop code on Linux, for Linux, but it only works out of the box on Windows!) 
 
I tried to build openEMS from source on Daedalus, but ran into issues with the dependent libraries, so I went one version back to Devuan Chimaera, where openEMS from the repositories is also not installed right, but it compiles successfully from source as described in the manuals, with only one or two hiccups, so do follow my instructions below, while also looking at the manuals.  
 
The saga continues...

Install Devuan Development Tools

To install the development tools on Devuan, do the following:
$ su -
toor
# apt update
# apt install build-essential
 
Now one should be able to pull openEMS from Github, compile and install it.

Build openEMS from Source on Devuan Chimaera

The openEMS build and install process is described here:
https://docs.openems.de/install.html 

Get the openEMS dependency files:
$ su -
toor
# apt install build-essential cmake git libhdf5-dev libvtk7-dev libboost-all-dev libcgal-dev libtinyxml-dev qtbase5-dev libvtk7-qt-dev
# apt install octave liboctave-dev
# apt install gengetopt help2man groff pod2pdf bison flex libhpdf-dev libtool
 
(The next line is not in the manual)
# apt install pip
# pip install numpy matplotlib cython h5py

Clone the repository, build and install in /home/devuan/opt, to keep it separate from the broken version in  /bin, so it won't get overwritten during a Linux update.
 
As the devuan user (not root!) do the following (watch for errors!):
$ git clone --recursive https://github.com/thliebig/openEMS-Project.git
$ cd openEMS-Project
$ ./update_openEMS.sh ~/opt/openEMS
(Alternatively leave out the tilde in the above command and it will go into /opt which is maybe better, but I don't want to deviate from the recommended path now, since it may cause issues with the tutorials. Leave it for another day)

Configure Octave

If you see: "OpenEMS and all modules have been updated sucessfully", add the required paths to Octave/Matlab:
addpath('/home/devuan/opt/openEMS/share/openEMS/matlab')
addpath('/home/devuan/opt/openEMS/share/CSXCAD/matlab')

You can setup these above paths using the “Edit”-Menu, “Set Path” in Octave.  
 
Run octave the first time from the command line (to auto configure some things) and exit it, then run it from the menu under Education.  If you just click the menu item, seemingly nothing will happen, until you despair and run it from the command line to check for error messages and then it will magically work. Don't ask me why!
 
Add openEMS to the devuan user search path:
export PATH=”$HOME/opt/openEMS/bin:$PATH”

Test It

See this, and do ALL the Linux tests to confirm that it really works as it should: https://docs.openems.de/install/check.html#check-installation-src
 
If you have no idea how Octave works, google for Octave beginner tutorials, such as this: www-mdp.eng.cam.ac.uk/web/CD/engapps/octave/octavetut.pdf
 
If you still have problems, the Octave setup is described here:
 
Congratulations, you are now allowed to grow an Official Linux Guru Beard :)
 
...and don't forget to send a Thank You message to Thorsten Liebig!

Other EM Utilities

I also installed kicad (https://www.kicad.org/), xnec2c (https://www.xnec2c.org/) for my RF hobby/work as well as gimp and inkscape to edit PCB footprint drawings and sometimes meshlab.  The tutorials showed that paraview is also needed to view .vtr files.

Here you go:
$ su -
toor
# apt install kicad xnec2c gimp inkscape meshlab paraview

Getting to work

Finally, go to the openEMS tutorials (https://wiki.openems.de/index.php/Tutorials.html), start at the top and work your way to the bottom.  That will keep you out of trouble for a while, especially since there are some syntax errors in the tutorial scripts that you will have to find, single step and fix in the Octave editor... :)

Crikey, now I need a long weekend to recover from this!

La voila!

Herman

Comments

Popular posts from this blog

Parasitic Quadrifilar Helical Antenna

This article was reprinted in OSCAR News, March 2018:  http://www.amsat-uk.org If you want to receive Satellite Weather Pictures , then you need a decent antenna, otherwise you will receive more noise than picture. For polar orbit satellites, one needs an antenna with a mushroom shaped radiation pattern .  It needs to have strong gain towards the horizon where the satellites are distant, less gain upwards where they are close and as little as possible downwards, which would be wasted and a source of noise.  Most satellites are spin stabilized and therefore the antenna also needs circular polarization, otherwise the received signal will flutter as the antennas rotate through nulls. The helical antenna, first proposed by Kraus in 1948, is the natural solution to circular polarized satellite communications.  It is a simple twisted wire - there seems to be nothing to it.  Various papers have been published on helix antennas, so the operation is pretty well understood. Therefore,

Weather Satellite Turnstile Antennas for the 2 meter Band

NEC2, 2 m band, 146 MHz, Yagi Turnstile Simulation and Build This article describes a Turnstile Antenna for the 2 meter band, 146 MHz amateur satcom, 137 MHz NOAA and Russian Meteor weather satellites.  Weather satellite reception is described here .  A quadrifilar helical antenna is described here .   Engineering, is the art of making what you need,  from what you can get. Radiation Pattern of the Three Element Yagi-Uda Antenna Once one combine and cross two Yagis, the pattern becomes distinctly twisted. The right hand polarization actually becomes visible in the radiation pattern plot, which I found really cool. Radiation Pattern of Six Element Turnstile Antenna Only a true RF Geek can appreciate the twisted invisible inner beauty of a herring bone antenna... Six Element Turnstile Antenna Essentially, it is three crosses on a stick.  The driven elements are broken in the middle at the drive points.  The other elements can go straight throug

Patch Antenna Design with NEC2

The older free Numerical Electromagnetic Code version 2 (NEC2) from Lawrence Livermore Lab assumes an air dielectric.  This makes it hard (but not impossible) for a radio amateur to experiment with Printed Circuit Board Patch antennas and micro strip lines. Air Spaced Patch Antenna Radiation Pattern You could use the free ASAP simulation program , which handles thin dielectrics, you could shell out a few hundred Dollars for a copy of NEC4 , You could buy GEMACS if you live in the USA, or you could add distributed capacitors to a NEC2 model with LD cards (hook up one capacitor in the middle of each element.), but that is far too much money/trouble for most. More information on driving an array antenna can be found here: https://www.aeronetworks.ca/2019/03/driving-quad-patch-array-antenna.htm l Air Dielectric Patch   The obvious lazy solution is to accept the limitation and make an air dielectric patch antenna. An advantage of using air dielectric, is that the antenn