GNU Radio on Linux
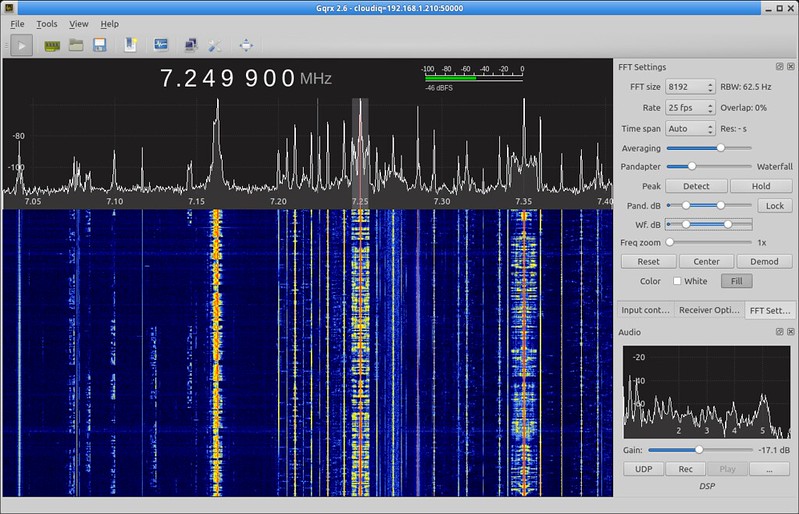
 I like the GQRX program which I use with the RTL-SDR and Great Scott Gadgets HackRF One and these are all very well supported on Linux and Mac as described here http://gqrx.dk/tag/hackrf.
So to get this lot working and keep it working, I bought a nice new Intel NUC https://www.intel.com/content/www/us/en/products/boards-kits/nuc.html and installed Ubuntu Linux Server 18.04 LTS on it.
This is a long term support (10 year) Linux version which means that it will get security updates, but the essentials will remain more or less the same, so my GNU Radio software should keep working until 2028 or beyond and not get broken every few months by Apple. Since I only use it every few months, it meant every time I wanted to use it, it was broken - sigh...
Ubuntu Linux Server Download
The advantage of a server version, is that it contains only the essential software packages to get a computer running efficiently - no bloatware. You are therefore assured of getting some raw speed.However, since I am not a complete masochist, I install the light weight Desktop Environment XFCE on it, so that I can do things without having to resort to ASCII art.
Download the 18.04 LTS server ISO file from here https://www.ubuntu.com/download/server/thank-you?version=18.04.1.0&architecture=amd64
On the Mac, open a terminal, set user to root and copy the ISO file to a USB stick as described here https://www.aeronetworks.ca/2013/05/using-dd-on-mac-to-copy-iso-file.html. Instead of dd, you can use cat also, it works just as well. (Even head or tail will do, if you can make head or tail of the syntax).
A word of caution: Never, never, never write to /dev/sda or /dev/disk1 since that will destroy your computer. Watch the ins and outs.
Basic Installation
The Linux server software installs in seconds - in the blink of a lazy eye. Stick the USB widget in the NUC and boot up. Create a user account and looong password and follow the defaults to use the whole disk, then reboot. As easy as borscht.You will now have a lightning fast machine that boots up to a beeyoootiful black screen and prompt, waiting patiently on your beck and call.
Install the Actually Useful Stuff
$ sudo su -password
# apt install xfce4 mplayer firefox geany mousepad vlc x264 ffmpeg gstreamer1.0-plugins-* libreoffice gimp pdfshuffler xournal evince links lynx xnec2c xnecview
Something in the above will automatically pull in the build-essential package, so the compiler and headers will be there too. With the above tools, you can control the world.
Go get some coffee, then:
# reboot
Login again and launch XFCE:
$ startx
Click the Default Config button and Mark's your Uncle. Now you need neither Timmy nor Saty anymore.
Static IP Address
In order to use the NUC remotely over ethernet, it will help if it has a static address, so you know how to reach it. You can configure this in the rc.local file, which is the last process to run at computer startup. This is the best place to put user additions to the system, since at this point, everything is up and running and stable.First see what the name of the ethernet port is:
# ip link show
# ip addr show
It could be enp0s25 or some equally silly device name. Also look at the address given by the DHCP server and pick a new one that is similar but not in the DHCP allocation range.
Create the /etc/rc.local file:
# cd /etc
# nano rc.local
Add this:
#! /bin/bash
ip addr add 192.168.1.200/24 dev enp0s25
Then make it executable and enable the rc-local process:
# chmod +x rc.local
# systemctl enable rc-local
# reboot
The machine will now have two IP addresses on the same port. One given by the DHCP server and the other statically assigned. Both should work.
Install GQRX
Install the GQRX repositories:# add-apt-repository -y ppa:bladerf/bladerf
# add-apt-repository -y ppa:myriadrf/
# add-apt-repository -y ppa:myriadrf/
# add-apt-repository -y ppa:gqrx/gqrx-sdr
# apt update
Finally, install gqrx:
# apt install gqrx-sdr
You can now run the Volk optimizer to get even more speed:
# apt install libvolk1-bin
# volk_profile
Remote Access with the Secure Shell
If you install the Quartz X server on your Mac, then you can open an xterm and launch a program on the NUC. It will then transparently pop up on the Mac desktop:$ ssh -X user@192.168.1.200 mousepad
Note that on this server version, the SSH daemon sshd runs at startup and since it has its own small X server and client built in, you can run X programs remotely with ssh, without actually running X on the server, but you need X, Xorg, or Quartz, on your desktop/laptop computer.
If the above mousepad example works, plug your SDR widget into the NUC and launch GQRX:
$ ssh -X user@192.168.1.200 gqrx
Now you can run the NUC in your radio shack with a screen, keyboard and rodent attached, or you can stick the NUC and SDR gadget inside a NUMA weatherproof box and put it on a mast with a satcom antenna, then access it remotely over ethernet from the comfort of your radio shack, or your living room couch, over SSH with your laptop machine.
WiFi Interface
The NUC WiFI interface required some subtle attention to make it work. This young lady's guide was helpful:https://www.linuxbabe.com/command-line/ubuntu-server-16-04-wifi-wpa-supplicant
First check if the device is detected and available:
# ifconfig -a
wlp58s0: flags=4099<UP,BROADCAST,MULTICAST> mtu 1500
ether d4:6d:6d:d8:c7:7d txqueuelen 1000 (Ethernet)
RX packets 0 bytes 0 (0.0 B)
RX errors 0 dropped 0 overruns 0 frame 0
TX packets 0 bytes 0 (0.0 B)
TX errors 0 dropped 0 overruns 0 carrier 0 collisions 0
Check if the firmware is installed:
# dmesg | grep firmware
[ 15.242446] iwlwifi 0000:3a:00.0: loaded firmware version 34.0.1 op_mode iwlmvm
Bring the interface up:
# ip link wlp58s0 up
Look for networks:
# iw dev wlp58s0 scan
BSS 0e:b6:d2:a0:ef:12(on wlp58s0)
last seen: 5690.766s [boottime]
TSF: 9933444402819 usec (114d, 23:17:24)
freq: 2437
beacon interval: 100 TUs
capability: ESS Privacy ShortSlotTime (0x0411)
signal: -78.00 dBm
last seen: 1292 ms ago
Information elements from Probe Response frame:
SSID: yourssid
Install wpa_supplicant, since the default iw tool suffers from a segmentation fault:
# apt install wpasupplicant
(Note that the Ubuntu wpasupplicant install package doesn't have an underscore)
Create a configuration file:
# wpa_passphrase yourssid yourasciipassphrase
network={
ssid="yourssid"
#psk="yourasciipassphrase"
psk=ab5dcc5eccfbf3ff0867e94bb9a73d6ccd32789ec9aa1ade204b8d4d876a5225
}
Write it to the configuration file:
# wpa_passphrase naila 037649906 > /etc/wpa_supplicant.conf
Verify that it actually works by running wpa_supplicant in the foreground:
# sudo wpa_supplicant -c /etc/wpa_supplicant.conf -i wlp58s0
Successfully initialized wpa_supplicant
wlp58s0: SME: Trying to authenticate with 54:b8:0a:1f:67:90 (SSID='naila' freq=2457 MHz)
wlp58s0: Trying to associate with 54:b8:0a:1f:67:90 (SSID='naila' freq=2457 MHz)
wlp58s0: Associated with 54:b8:0a:1f:67:90
wlp58s0: CTRL-EVENT-SUBNET-STATUS-UPDATE status=0
wlp58s0: WPA: Key negotiation completed with 54:b8:0a:1f:67:90 [PTK=CCMP GTK=TKIP]
wlp58s0: CTRL-EVENT-CONNECTED - Connection to 54:b8:0a:1f:67:90 completed [id=0 id_str=]
Ctrl-C
Run it again with the -B option in the background:
# sudo wpa_supplicant -B -c /etc/wpa_supplicant.conf -i wlp58s0
Successfully initialized wpa_supplicant
Get an IP address with DHCP:
# dhclient wlp58s0
Test the connection:
# ifconfig -a
wlp58s0: flags=4163<UP,BROADCAST,RUNNING,MULTICAST> mtu 1500
inet 192.168.1.17 netmask 255.255.255.0 broadcast 192.168.1.255
inet6 fe80::d66d:6dff:fed8:c77d prefixlen 64 scopeid 0x20<link>
ether d4:6d:6d:d8:c7:7d txqueuelen 1000 (Ethernet)
RX packets 75 bytes 7048 (7.0 KB)
RX errors 0 dropped 0 overruns 0 frame 0
TX packets 22 bytes 3060 (3.0 KB)
TX errors 0 dropped 0 overruns 0 carrier 0 collisions 0
Hermans-MacBook-Pro:~ herman$ ping 192.168.1.17
PING 192.168.1.17 (192.168.1.17): 56 data bytes
64 bytes from 192.168.1.17: icmp_seq=0 ttl=64 time=5.176 ms
64 bytes from 192.168.1.17: icmp_seq=1 ttl=64 time=1.836 ms
W00t!
Put the following in /etc/rc.local and put a few sleeps in there to allow the magical fairy dust to settle:
ip link wlp58s0 up
sleep 1
sudo wpa_supplicant -B -c /etc/wpa_supplicant.conf -i wlp58s0
sleep 5
ip addr add 192.168.1.250/24 dev wlp58s0
La voila!
!Updates
For the next decade, only do security updates (or no updates at all if it is not hooked to the wild wild web). DO NOT do feature updates. This way, the system should keep working forever and ever, the same as the day you originally installed it.Happy RF Hacking!
Herman
Comments
Post a Comment
On topic comments are welcome. Junk will be deleted.